These icons link to social bookmarking sites where readers can share and discover new web pages.
One common problem with the Apple //e platinum is the fact that keyboard keys stop working with time. The keys are built to last forever, unless you smash them. What happens is that their contacts get dirt and oxidized with time and you have to push the key hard to get it working. Some people usually fix this by dropping a small amount of alcohol inside the key while hitting the key a few times. It works sometimes but, in general, the problem comes back soon. I will show here how to disassemble the key, get to their contacts and clean them, making the key as new.
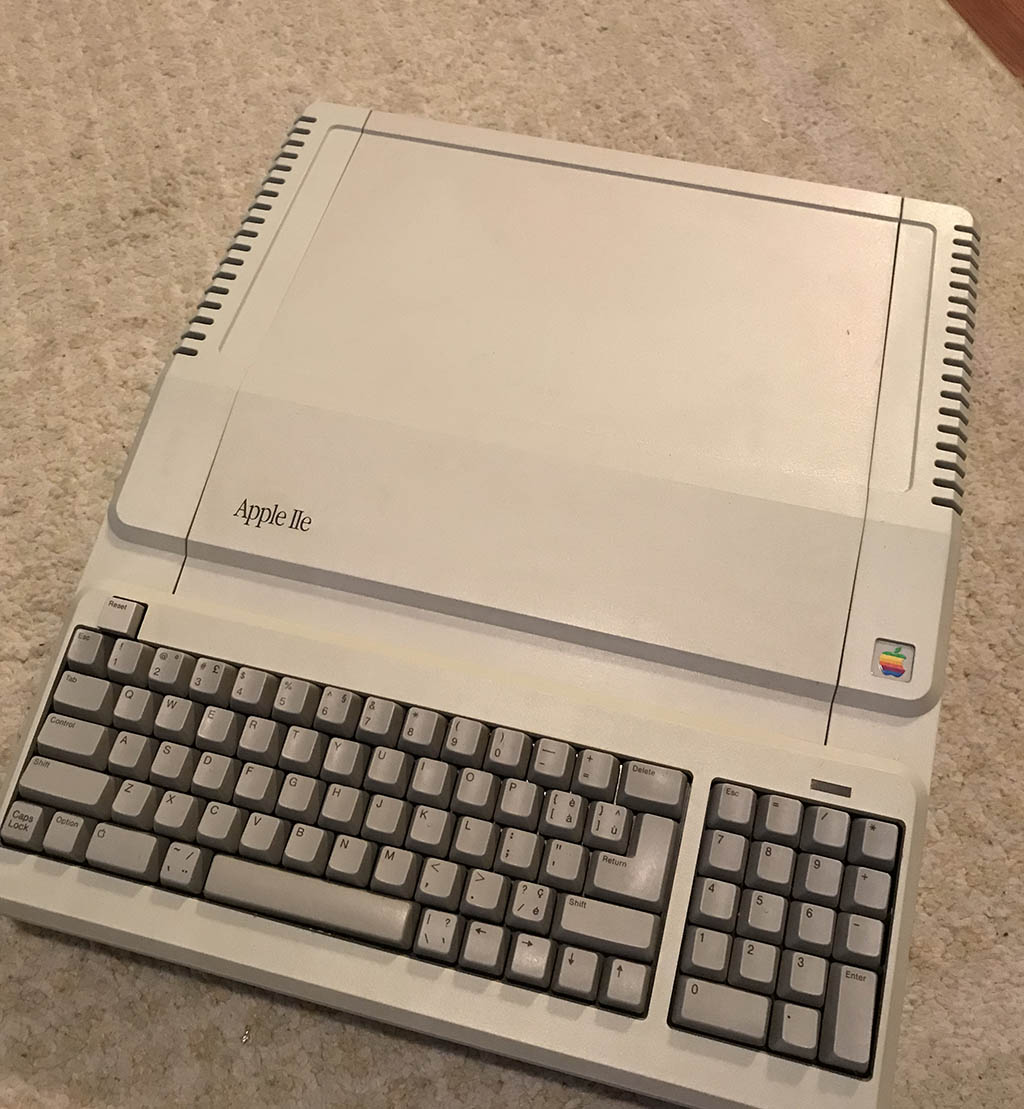
My Apple //e Platinum.
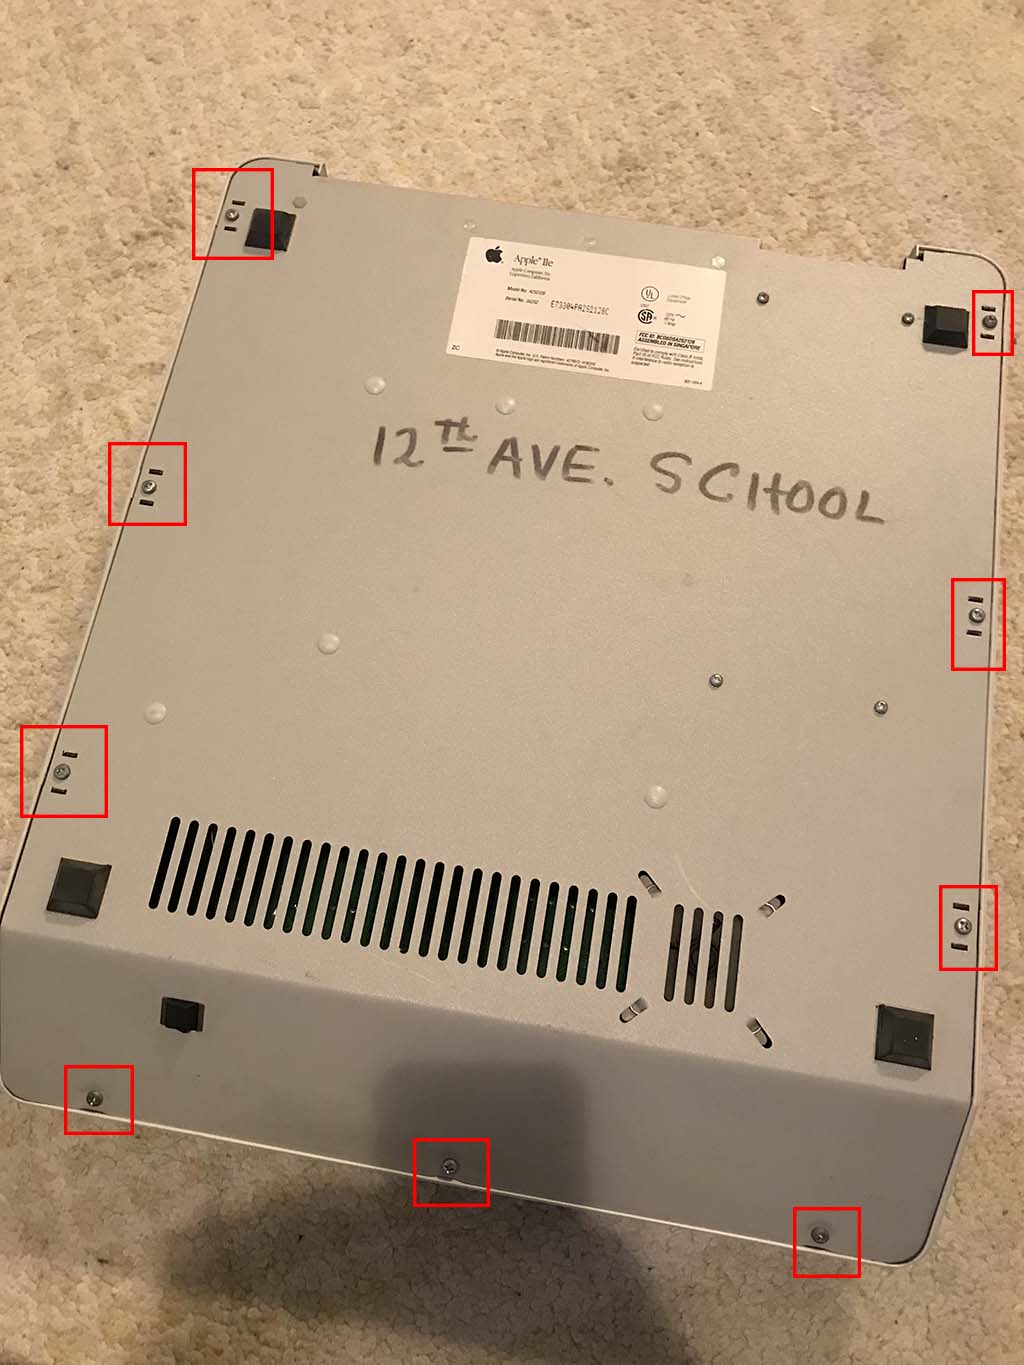
First of all, turn you Apple // upside down and remove the screws that hold the case to the metal base. It is very easy, see picture bellow. Yes, my //e once was owned by a school somewhere in the USA. Now it lives in Brazil!
Apple //e Platinum backplate. Red squares correspond to the location of the screws that hold the plastic case to the backplate.
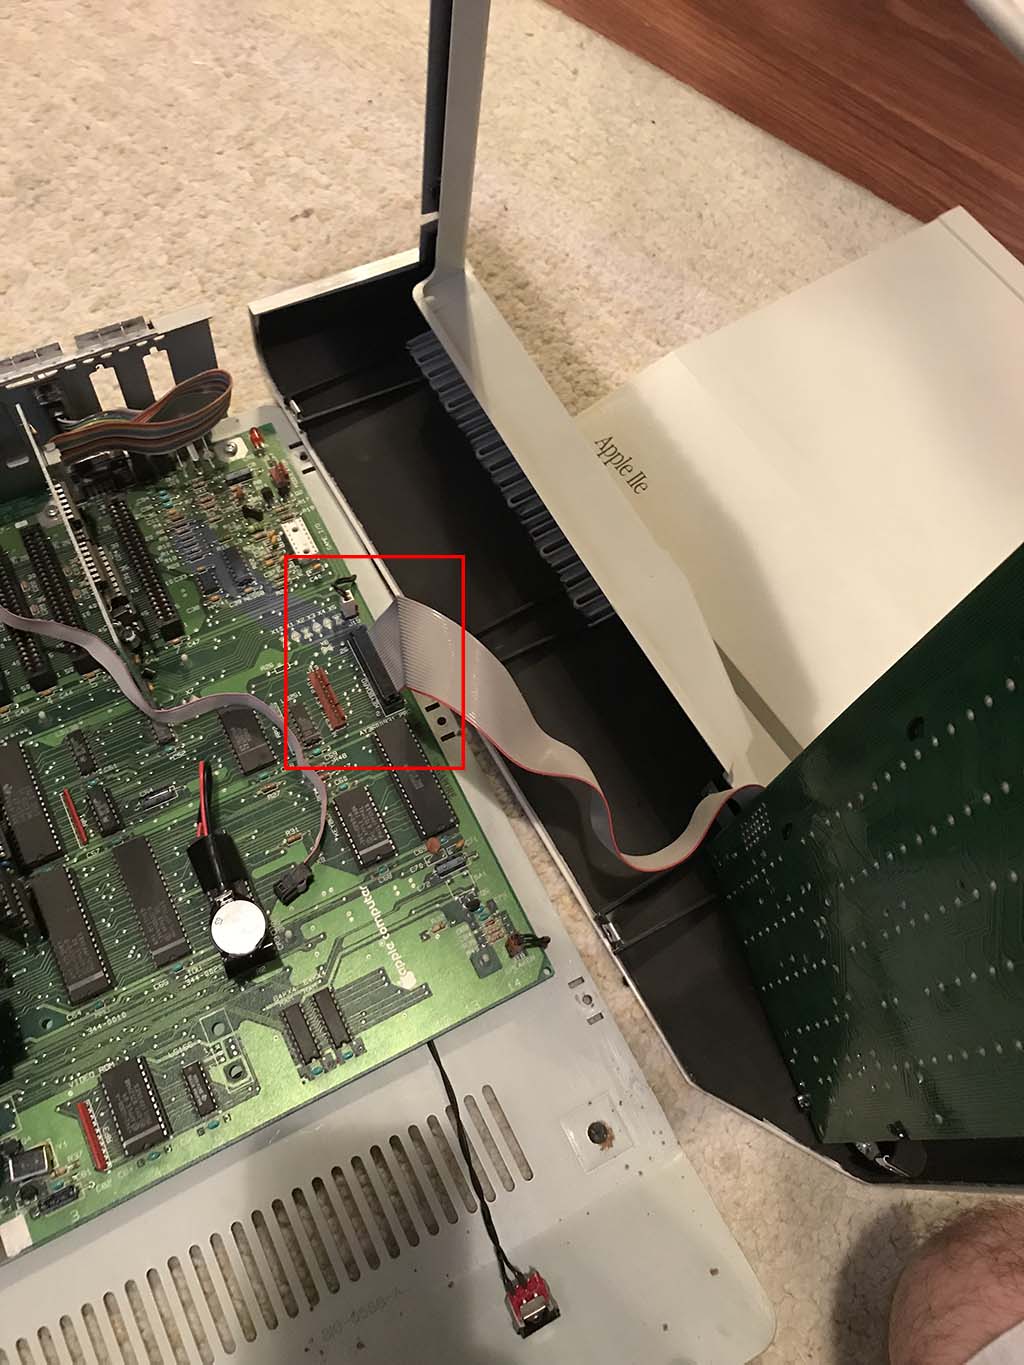
Remove the case and disconnect the keyboard cable in the main board (see picture).
Keyboard connection on the Apple //e Platinum mainboard.
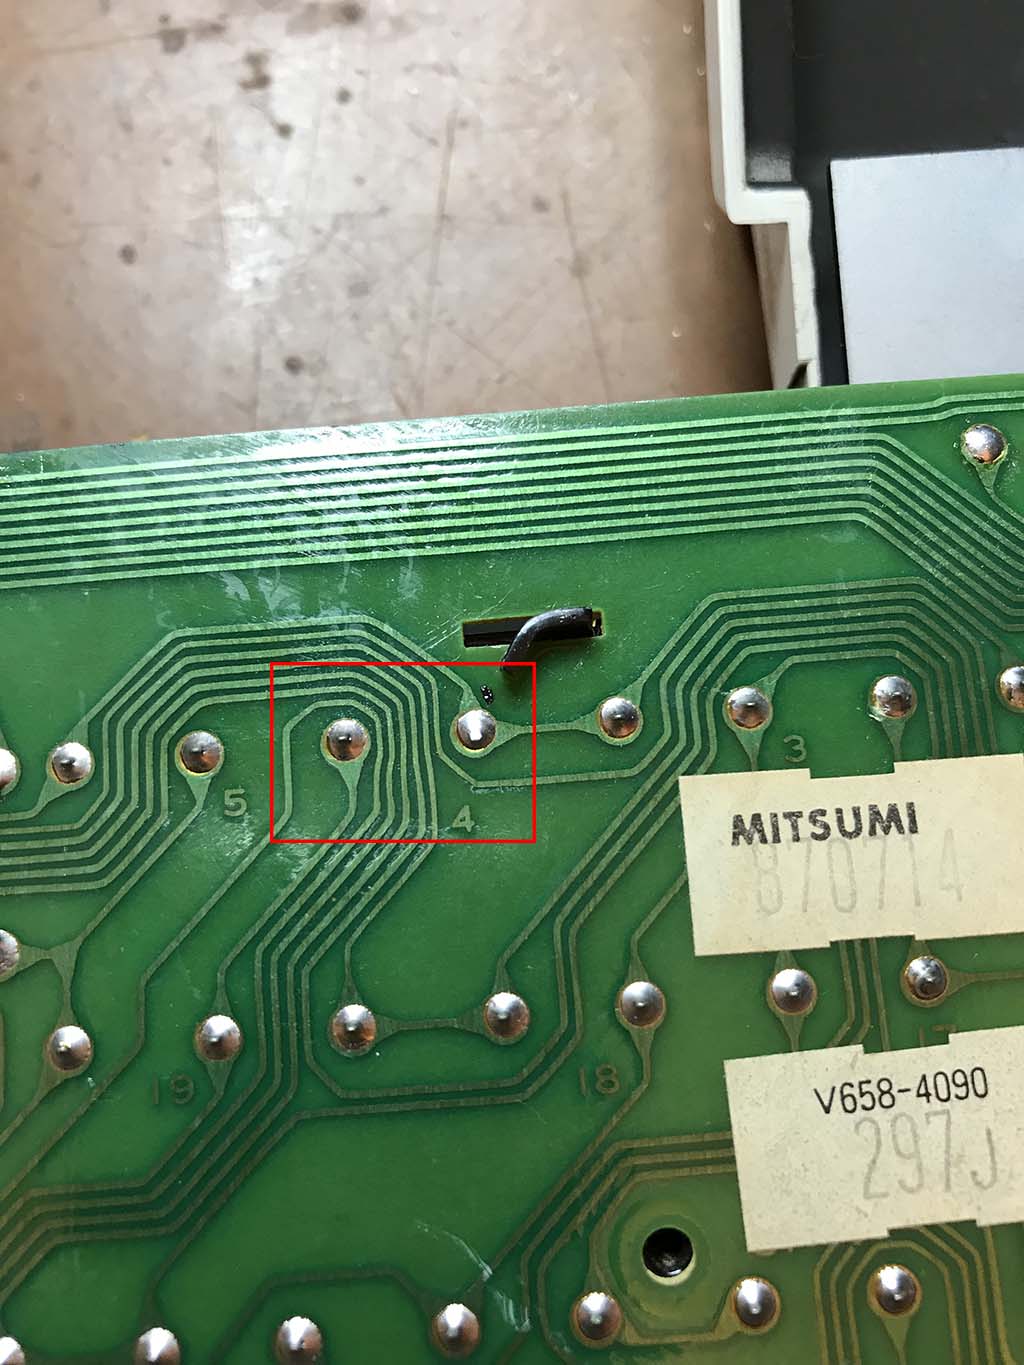
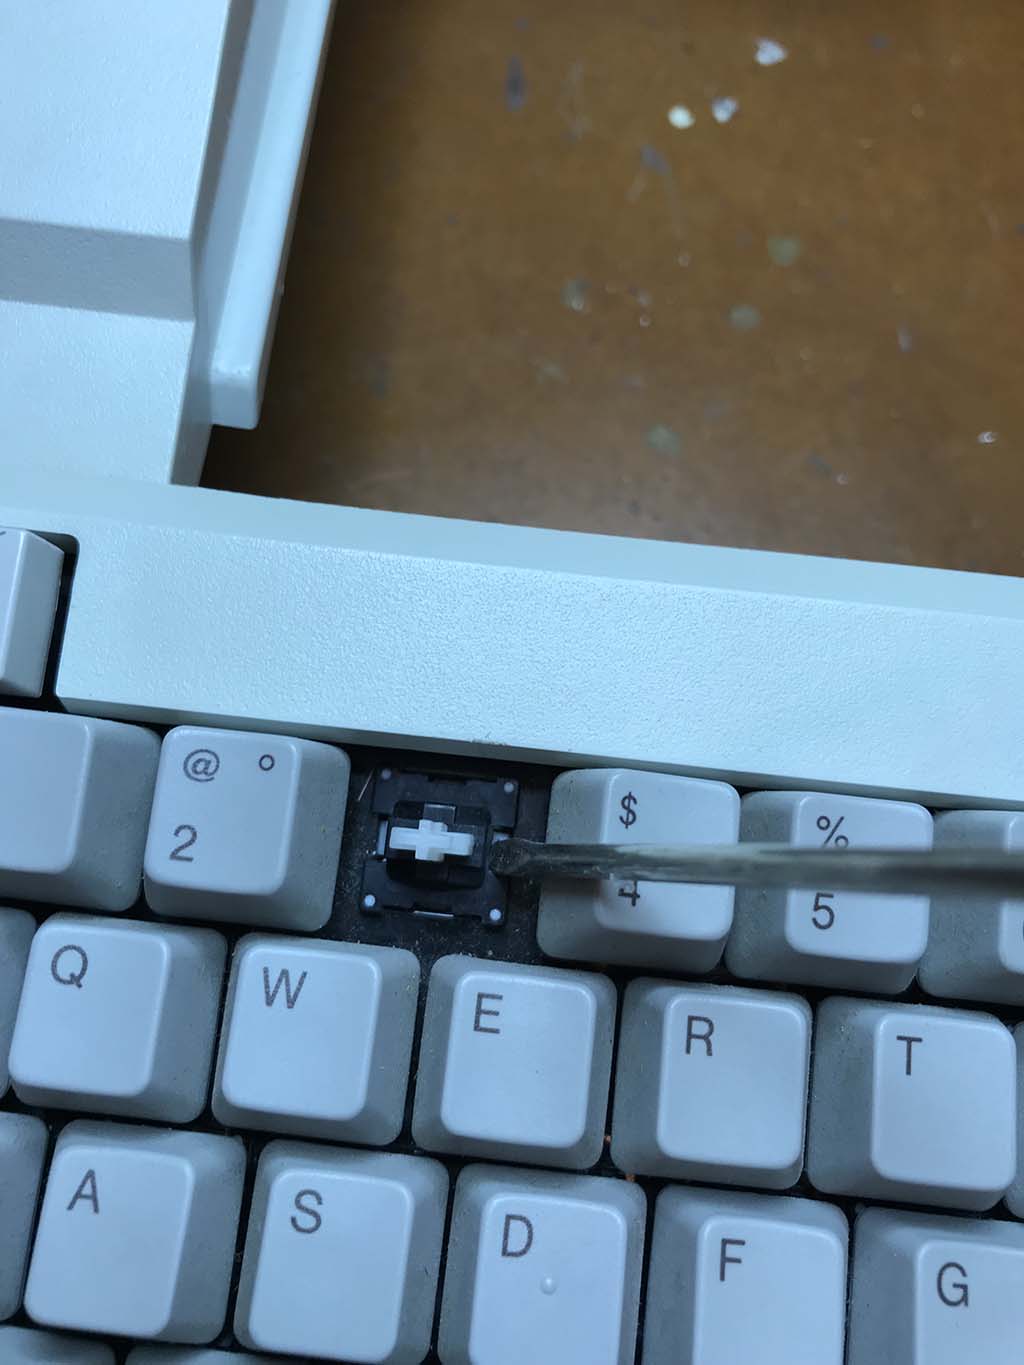
Ok, I will disassemble the "3" key. It is not working properly. I need to hit it very hard and, sometimes, squeeze it a little, in order to make it work. The keys are soldered to the keyboard board in two positions. You need to find out where they are soldered. In the picture bellow I show, for instance, where the "3" key is soldered. Remove it. It is not hard!
Solder points of the "3" key in the keyboard board.
On the other side, remove the keycap. In order to remove the key, use a small screwdriver and push the latches on each side of the key, as in the picture bellow.
Removing the key with a screwdriver.
Now we have to disassemble the key in order to access the electrical contacts and restore them. It is MUCH EASIER than it looks like. But be patient if it is your first time. I am used to it so I restore one entire key in just a few minutes, no more than five minutes. If it is your first time, maybe it will take you about 15 minutes to complete the work. To open the key you use a small screwdriver to raise the latches on each side of the key. You will see that it opens very easily. You don't need to use much strength. See picture bellow in order to check for the latch and the position of the screwdriver.
Opening the key by raising the latches on each side of it.
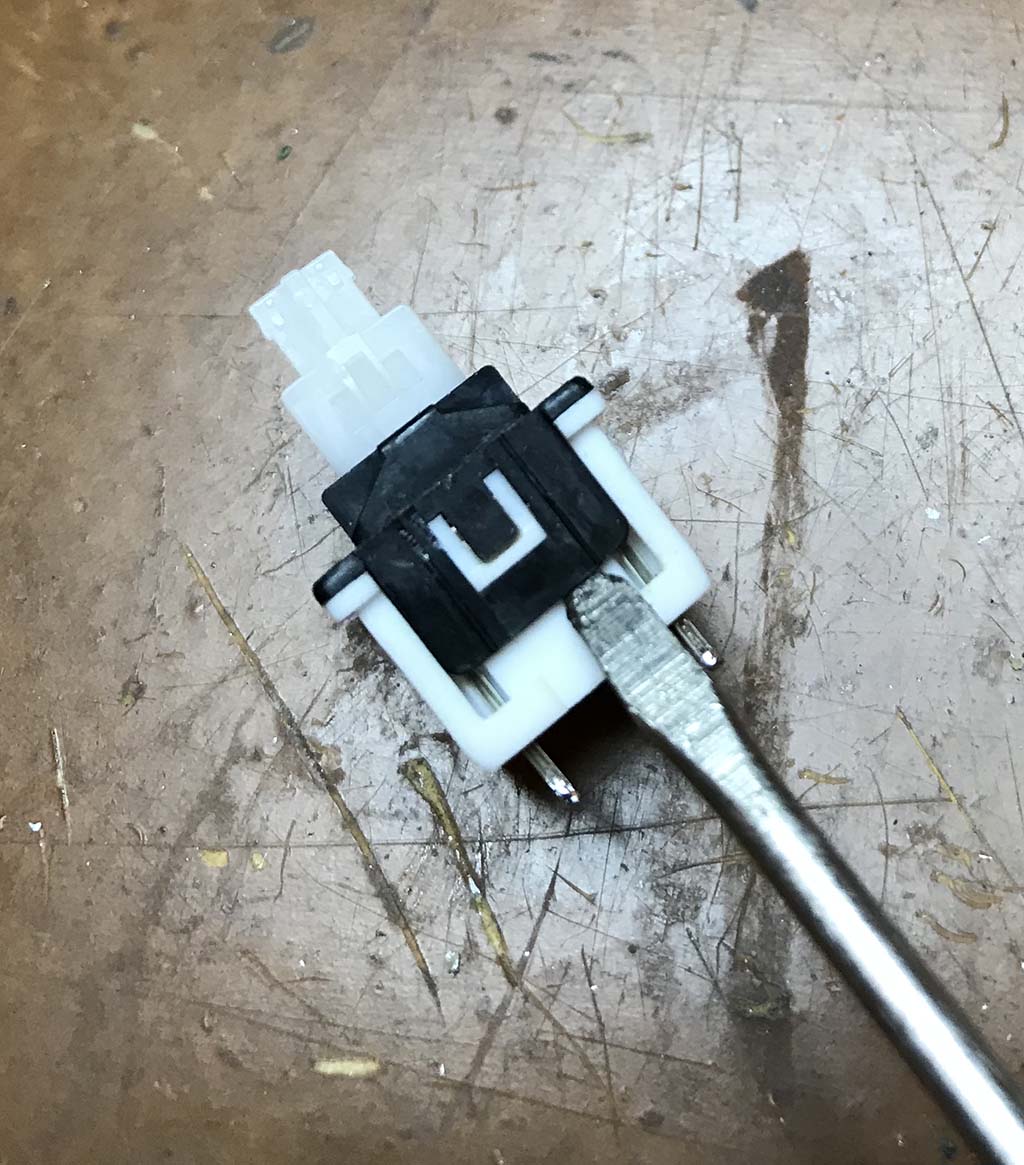
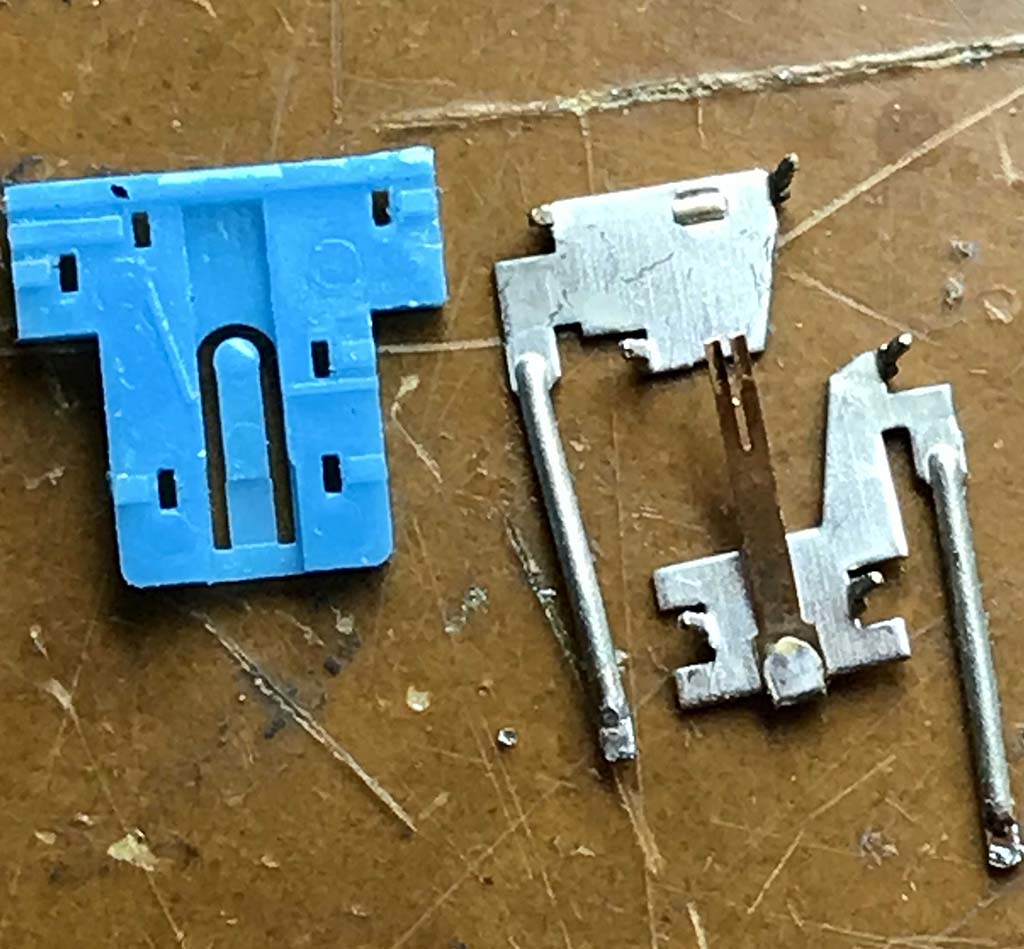
The picture bellow shows the opened key, after I removed the top part from the bottom part. Next I show the top part in detail. Please be careful. There is a spring inside it and it is easy to loose it.
Opened key.
Top part of the key. Note the small spring. Save it!
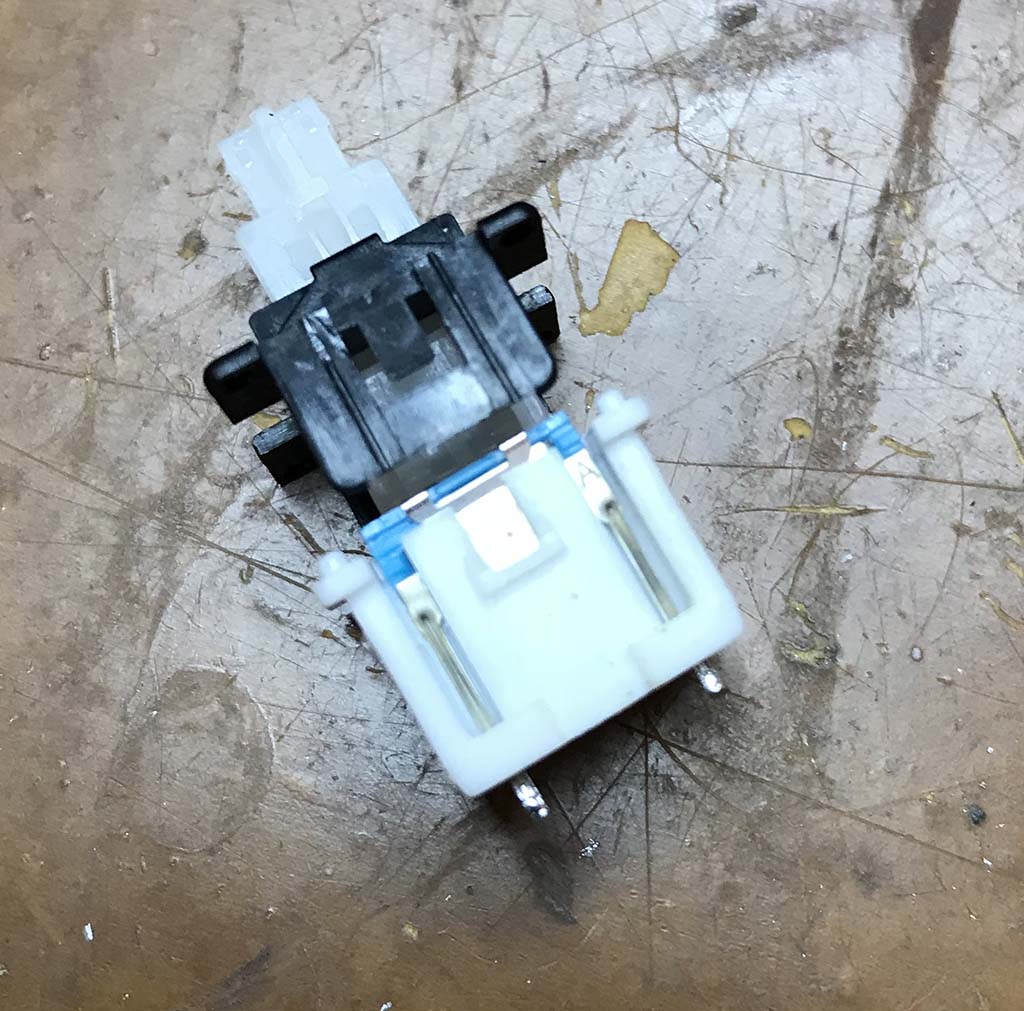
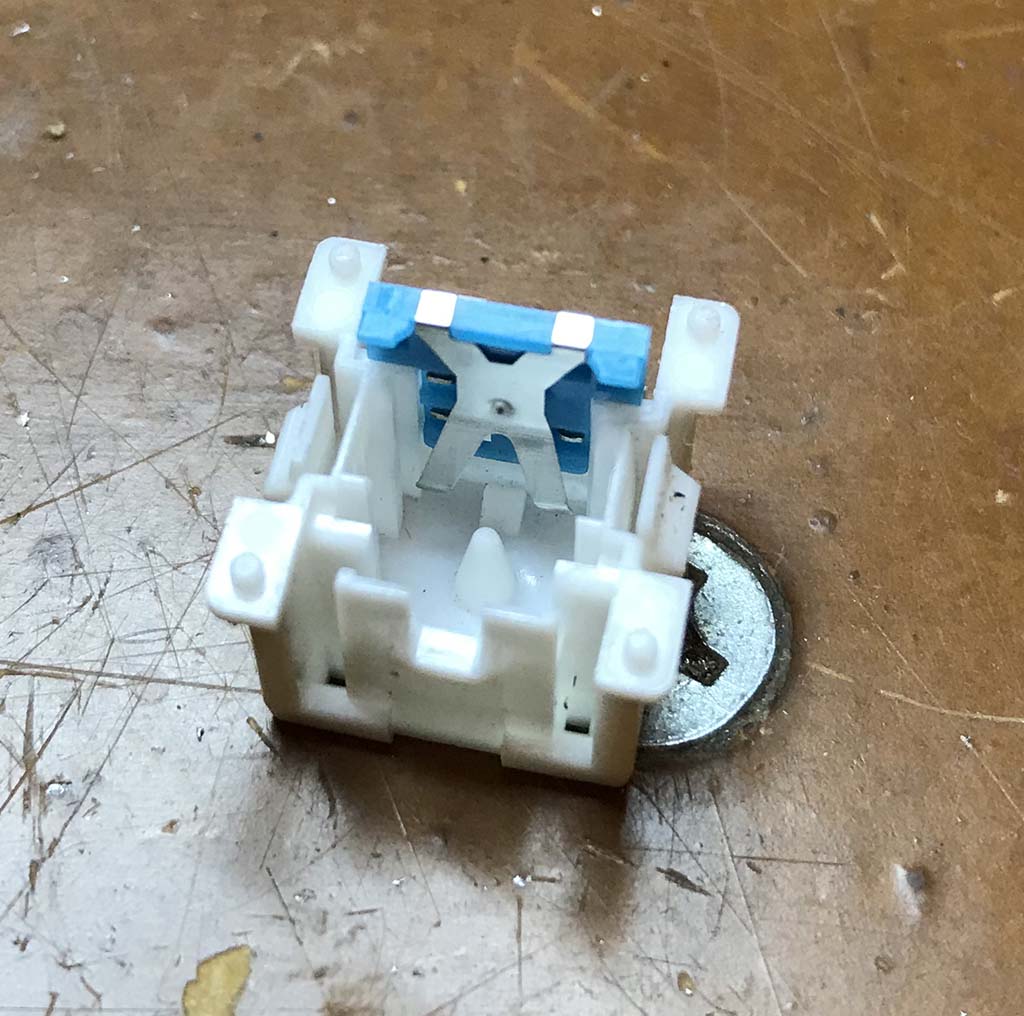
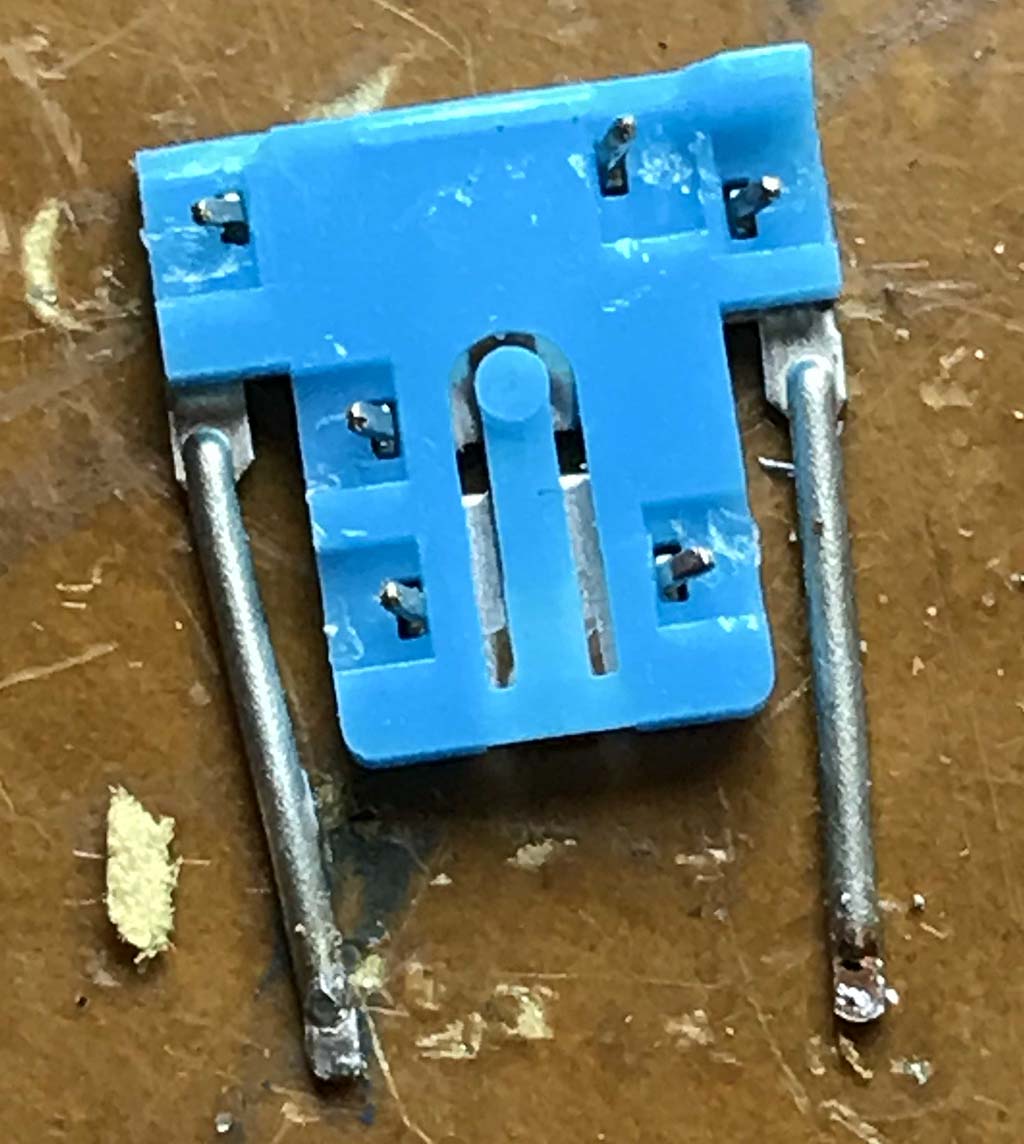
We will work just on the bottom part of the key (see picture bellow). Put the top part aside and, once more, don't loose the spring! In the bottom part of the key, note the blue plastic with the metal contacts on it. This is where all the important stuff is.
Bottom part of the key. Note the blue plastic with the electrical contacts on it.
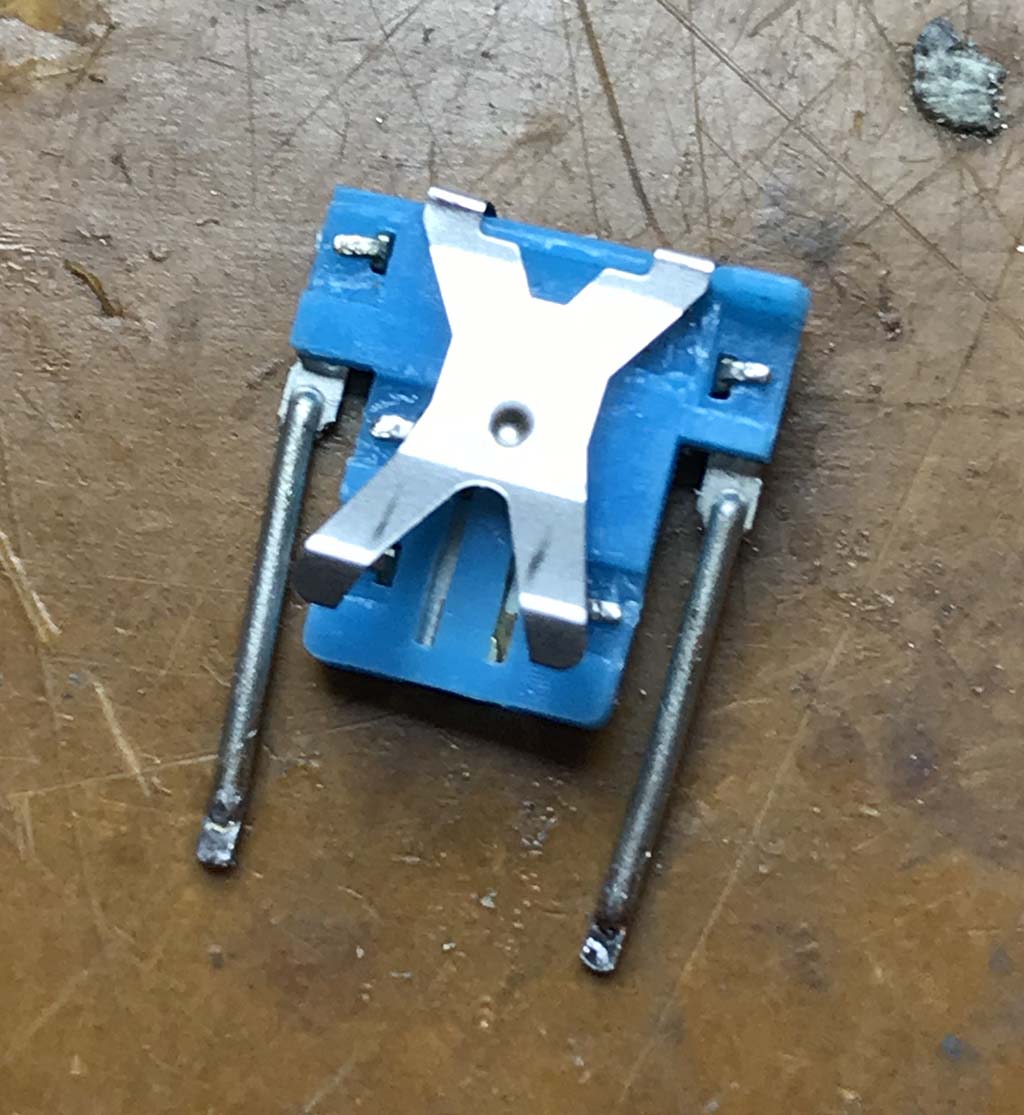
Pull the blue plastic off of the key. It is very easy. You can use your fingers or a small plier. There is nothing holding it and it will slide without any trouble. Figure bellow shows the blue plastic in detail.
Detail of the blue plastic. Note the "X" shaped metal. This is a metal spring that will push the electric contacts.
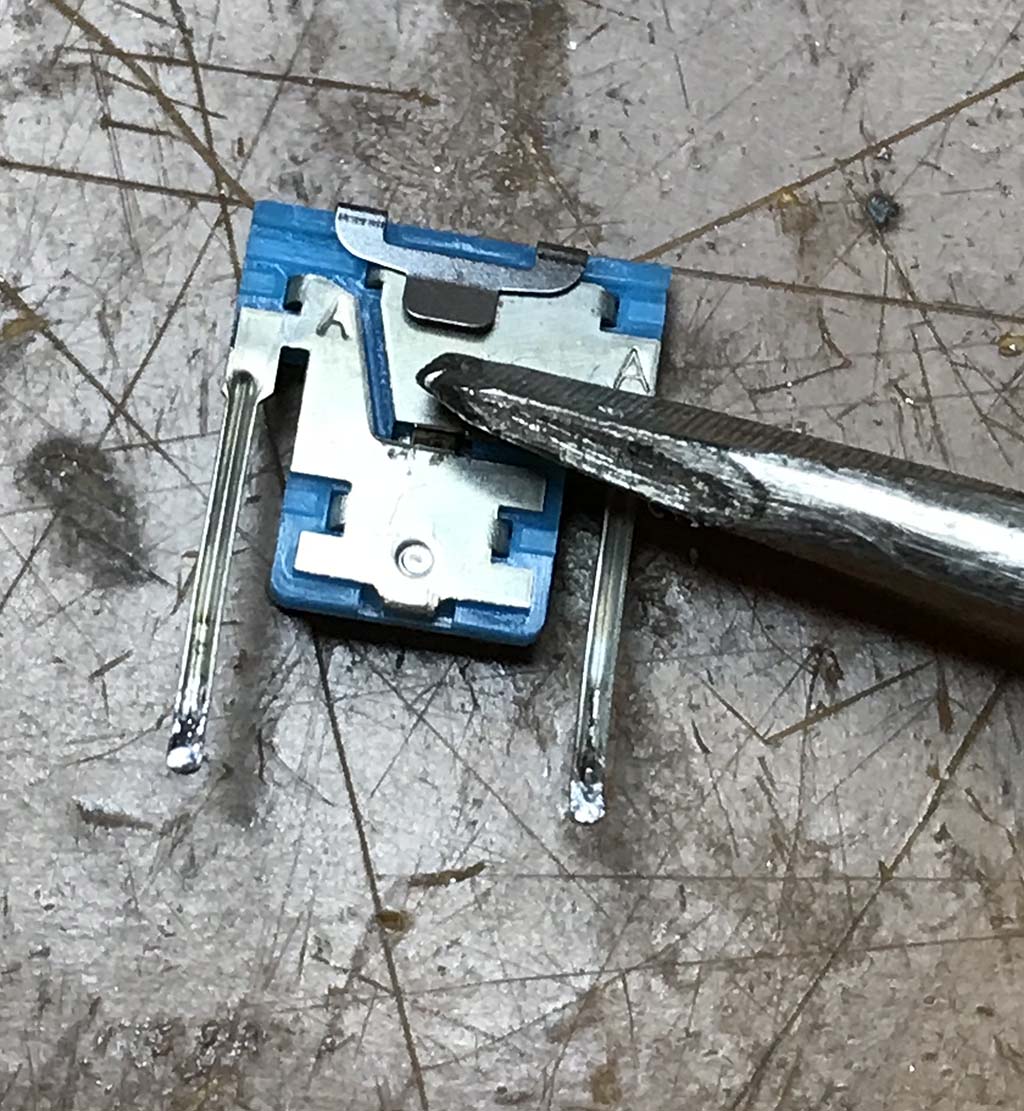
Note the "X" shaped metal piece on top of it. It is just a funny shaped spring that will be used against the plastic to force the electric contacts between the two metal pieces that are in the back of the blue plastic. In order to access the contacts we need to remove this "X" shaped part. Turn the blue plastic to the other side and using a screwdriver push the latch that holds this "X" shaped piece, as in the figure bellow.
The other side of the blue plastic showing the latch that holds the "X" shaped piece. Use a screwdriver to remove it.
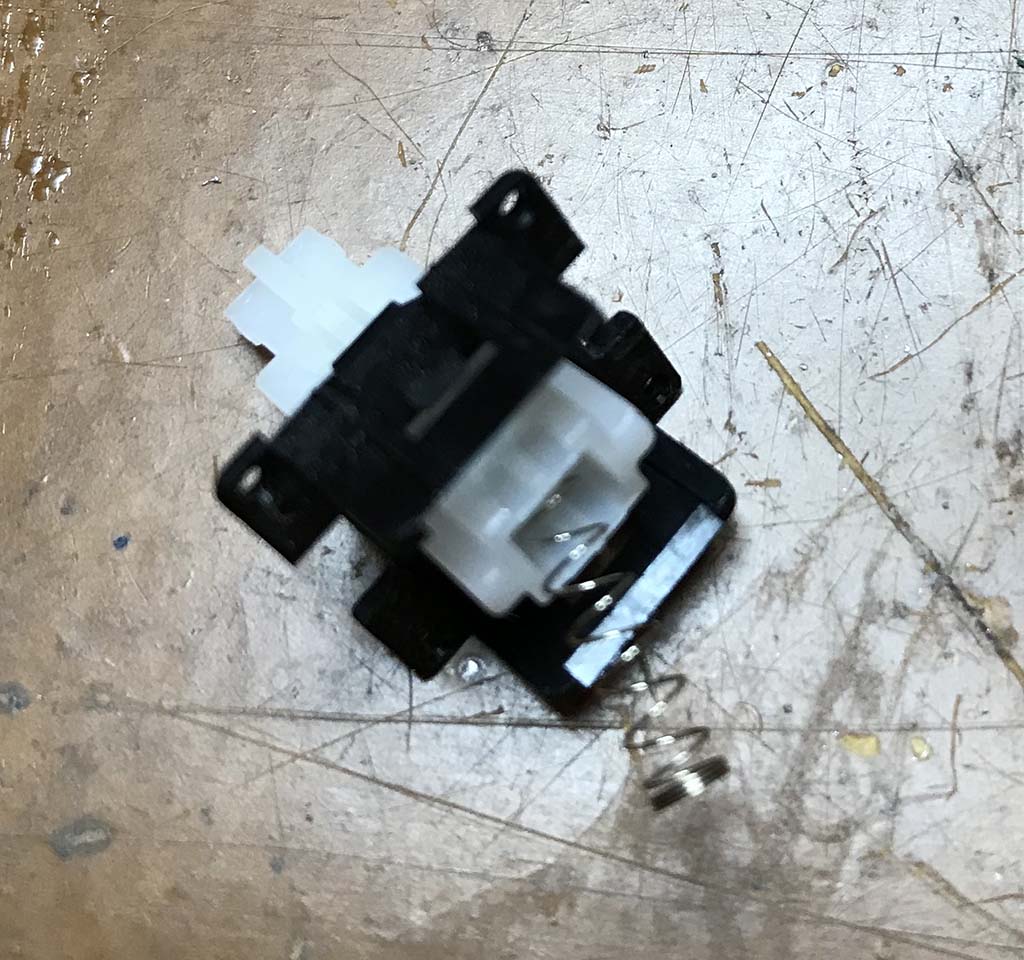
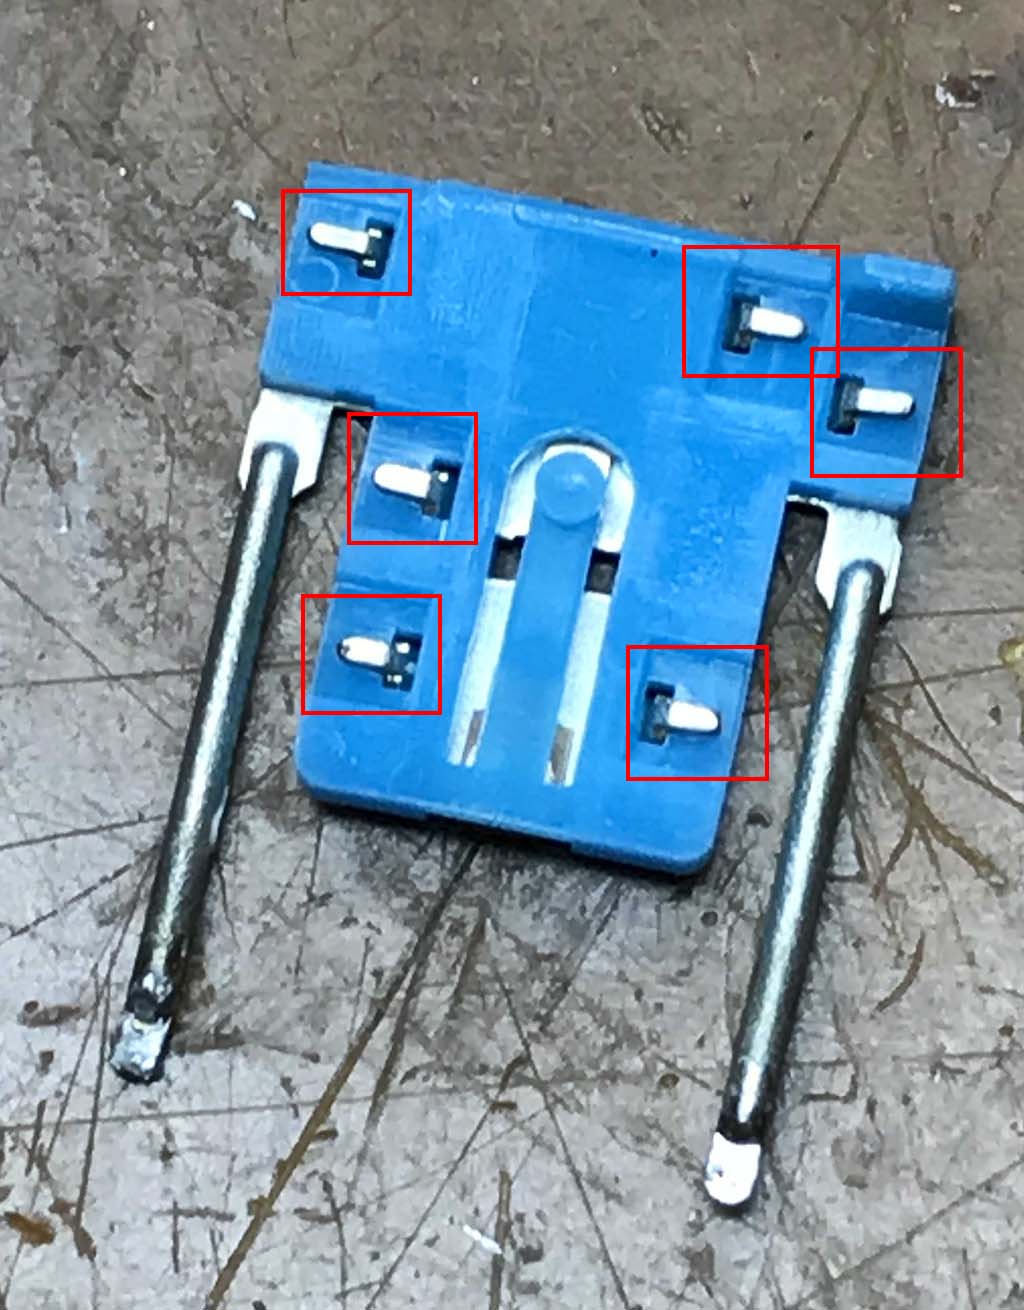
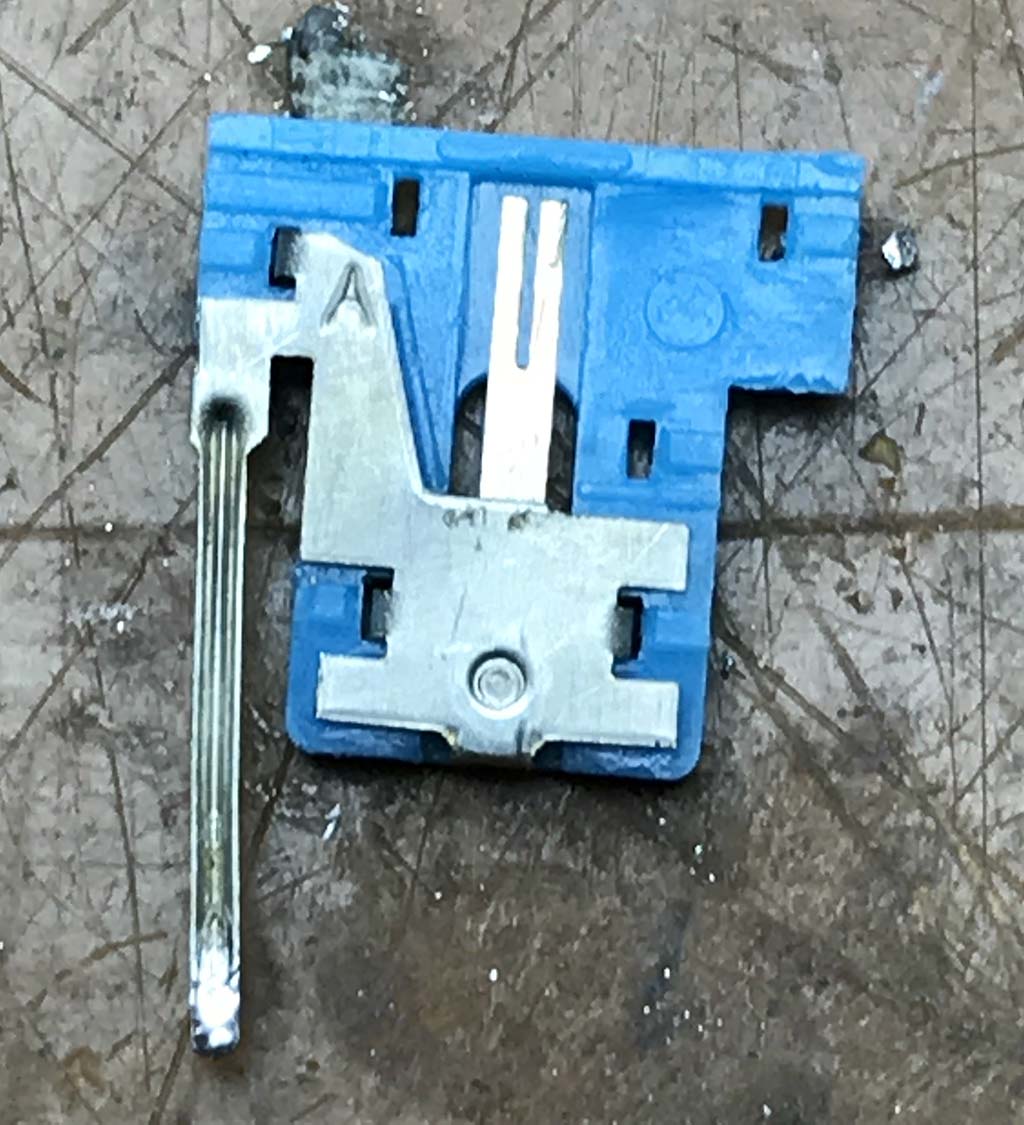
In the picture bellow I sow you the blue plastic with the electrical contacts without the "X" shaped spring. We will need to remove these contacts from the blue plastic. You do it first by raising the latches indicated by the red squares in the picture. Use a very small screwdriver to do it. Note the small plastic spring in the center of the blue plastic. When you press the key, the "X" shaped spring is pushed against this blue plastic spring which closes the electric contacts in the back of the blue plastic, activating the key. Very simple. Very difficult to break. This key is made to last forever!
Raise the latches indicated by red squares in order to remove the electric contacts from the blue plastic.
In the picture bellow I show you the raised metal latches on the blue plastic, just to let you know how it is done.
Raised metal latches.
You just need to remove the two metal parts of the blue plastic. Next I show the picture of the disassembled blue plastic, in which you can see the two metallic contacts. In the bottom contact you can see a very thin copper spring. This is the part pushed against the top contact when you hit the key. When new, this has copper color, a kind of golden color. If rust or dirt, like in this case, the color is kind of red or brown. Clear, using alcohol and a cotton swab, these contacts. Be careful because the copper part is very thin. The coper part usually needs some extra cleaning and, sometimes, sanding. I use a very small grain sand and pass it on the copper spring a few times. Do not need to make pressure. Just the weight of the sand paper will do the job. This part will become very bright. You will notice it.
Contacts removed from the blue plastic. In the bottom contact there is a copper spring. This is what closes the circuit when you press a key. Please notice how dirt and rust it is. It should be very bright and clean.
After you clean the contact, put this part back to the blue plastic and closes it latches, as in the picture bellow. Note how bright the contact is now. It will last for the next decade or so.
Cleaned copper contact put back to the blue plastic.
Now, put back the other contact, closes it latches. Put back the "X" shaped metal spring. Put the blue plastic back to the bottom part of the key and closes the key. DONE!!! Test it before you solder the key back to the keyboard circuit. IT IS DONE!
I've been doing this many times already. I recovered about 10 keys of my //e Platinum without loosing any key. If you have any question, please ask. I will be happy to help.